Saturday, August 20, 2011

a little more spooooky!

A little more spooooky Halloween goodness for you today! (I warned you last week!) I used the August stamps on these two cards, along with other matching goodies from the catalog.  (See previous post for more info on this fun Halloween stamp set!)
On both of these cards I used a while colored pencil to highlight my images.  The sentiment on this first card, as well as the stripe are from the new patterned papers - I LOVE that CTMH has jumped on board and added that little strip to the edge of their patterned papers!

On this second card, I used the felt frame from the Workshops on the Go kit, but you can also get it in the Midnight Felt Shapes sheet.  I stamped the witch's head inside the frame, and added some other witchy goodies, and again added the highlights in white colored pencil.  I was sort of going for a "witch's house scene" although I'm not sure I totally pulled it off! LOL!
Next week. . .home decor project! It's all done, i just need to photograph it for you! Have a terrific weekend, and a fabulous week! Make sure you snag this August stamp set before it's TOO LATE! September is RIGHT around the corner!

Thursday, August 11, 2011

BOO!

I don't know about you, but we are pretty dang ready for AUTUMN around here. 
And playing with Halloween stamps and paper only makes it worse.  Or better. I'm not sure what it does, but it is certainly making me THINK about fall weather and festivities!
For the next few weeks, I'm going to be sharing some projects centered around the new paper pack, Mischief, and this month's Stamp of the Month, called Wicked.  
I am not a HUGE Halloween person.  I love pumpkins, and kids dressed up in cute costumes.  And I certainly love candy! But I'm not so much into the spooky stuff. That all being said, I really LOVE this stamp set! The cat is stinkin' adorable, and I love that honeycomb pattern.  At first, I wasn't sure what to do with it, but i think it made the perfect little background for my sentiment! (It would be a great journaling spot too - and you can stamp it repeatedly to make a background!)

So there you have it! I think the card is pretty self-explanatory.  I inked the edges of everything.  And the paper I stamped the witchy woman onto, has the fence along the bottom edge - it worked perfectly.  (And did you notice the tiny jewels I added to her shoes!?) 

I'll be back next week with a few more cards (and maybe a home decor project later this month) to get you all ready for FALL!!!  

Thursday, August 4, 2011

all new goodies!!!!

Well I just returned home from a week of playing with BRAND NEW GOODIES!  Today's card features NEW NEW NEW, . . .new Roxie patterned paper (you are going to LOVE the new thicker cardstock weight patterned paper!) Also a new stamp set, and this image was cut out with the NEW Cricut cartridge! (you can see the new Close To My Heart Cricut cartridge, and the coordinating stamps HERE).  I have all of the new paper with me at home now, as well as the new August Stamp of the Month, and I will have lots more to share in the coming weeks!

Saturday, July 30, 2011

Pair-a-Phrase - double stamp set !

This card was created using the Pair-A-Phrase stamp set and Elemental paper pack.
Created by Laura Williams

August 15-September 31 you can earn this special DOUBLE stamp set - both sets are Size D - when you place an order of $75 or more.  If you place that order between August 15 and August 31 you can also purchase the August Stamp of the Month for $5.00 and receive an additional SPECIAL stamp set for free.  Talk about a big bang for your buck!

August SOM - Wicked
Free stamp set with the purchaqse of SOM A Typeface

Saturday, July 23, 2011

Flower Pot

One of the new-to-me sets that I got recently is Flower Pot.   I had fun coloring little flowers, and doing a lot of paper-piecing with this set.  The flower pots are really easy to work with, no matter how you want to color them! It's a really fun set to play with! 
On this second card, I paper-pieced the flower pot with patterned paper, which I LOVE.  I also added tiny Opaques to the flowers' centers.

I have to keep this post short and sweet today, because tomorrow we are heading up to North Carolina to meet my parents!!!!! I have a MILLION things to do!!!! I know my mom has NEW PRODUCT to play with when I arrive though, so we'll try to whip up some goodies to share with you next time. See you next week! Thanks for stopping by!
xoxo

Sunday, July 17, 2011

RETIRING JULY 31

The following items are not included in the new Autumn/Winter Idea Book. This means they can not be ordered after July 31. Please note additional information as you look through this list. If you see something you can’t live without, contact me asap to place your order before the items are sold out or no longer available.


• Bliss Level 1 -- X7132A pg 12
• Bliss Level 2 -- X7132B pg 12
• Bliss stickease -- X7132C pg 12

• Miracle L1 -- X7133A pg 16
• Miracle L2 -- X7133B pg 16
• Miracle stickease -- X7133C pg 16

• Sweetheart L1 -- X7134A pg 20
• Sweetheart L2 -- X7134B pg 20
• Sweetheart stickease -- X7132C pg 20

• Wings L1 -- X7135A pg 24
• Wings L2 -- X7135B pg 24
• Wings stickease -- X7135C pg 24

• Magnifique L1 -- X7127A pg 38
• Magnifique L2 -- X7127B pg 38
• Magnifique stickease -- X7127C pg 38

• Olivia L1 -- X7128A pg 38
• Olivia L2 -- X7128B pg 38
• Olivia stickease -- X7128C pg 38

• Hooligans L1 -- X7129A pg 39
• Hooligans L2 -- X7129B pg 39
• Hooligans stickease -- X7129C pg 39

• Mistletoe L1 -- X7130A pg 39
• Mistletoe L2 -- X7130B pg 39
• Mistletoe stickease -- X7130C pg 39

• Sweetheart WOTG -- G1017 pg 41
• Lucky WOTG -- G1018 pg 41
• Sophia WOTG -- G1019 pg 41
• Bliss WOTG -- G1020 pg 42
• Fanfare WOTG -- G1021 pg 42
• Mayberry WOTG -- G1022 pg 42
• Miracle WOTG -- G1023 pg 43
Wings WOTG -- G1016 pg 43

• 1” x 1 ½” block -- Y1001 pg 45
• 1” x 6 ½” block -- Y1005 pg 45
• 2” x 11” block -- Y1007 pg 45
• 2 ½” x 2 ½” block -- Y1004 pg 45
• 4 ½” x 6 ½” block -- Y1011 pg 45
• My Acrylix block starter kit -- Y1500 pg 114

• Envelope flats – 2 ½” x 3 ½” -- Z1021 pg 114
• Envelope flats – 3” x 3” -- Z1022 pg 114
• Envelope flats – 3” x 4 ¾” -- Z1023 pg 114
• Envelope flats – 4” x 4” -- Z1024 pg 114
• Envelope flats – 4 ½” x 4 ½” -- Z1244 pg 114
• Envelope flats – 5” x 5” -- Z1025 pg 114
• Envelope flats – 5” x 7” -- Z1026 pg 114
• Envelope flats – 5 ½” x 4 3/4 ” -- Z1027 pg 114
• Envelope flats – 6” x 6” -- Z1028 pg 114
• Envelope flats – 8” x 3 ½” -- Z1029 pg 114

• Designer ribbon – cranberry -- Z1209 pg 115
• Designer ribbon – buttercup -- Z1154 pg 115
• Designer ribbon – sweet leaf -- Z1125 pg 115

• Sophia L2 Journaling Spots -- Z1357 pg 116
• Mini Medley Accents – Pear -- Z1339 pg 117
• Mini Medley Accents – Lagoon -- Z1340 pg 117
• Mini Medley Accents – Outdoor Denim -- Z1277 pg 117
• Top Coats – Framed In -- Z1211 pg 118
• Rub Ons – Across the Board -- Z1231 pg 118
• Rub Ons – Primavera -- Z1265 pg 118

• Dimensional Elements – Villa -- Z1390 pg 118
• Dimensional Elements – Miracle -- Z1354 pg 118
• Dimensional Elements – Booksmart -- Z1223 pg 119
• Dimensional Elements – Borders -- Z1156 pg 119
• Dimensional Elements – Framed Fun -- Z1140 pg 119
• Dimensional Elements – Plain Chipboard -- Z1164 pg 119
• Dimensional Elements – Stars -- Z1312 pg 119
• ALL Dimensional Elements Monograms – A through Z -- pg 119 (new DE alphabets in fall book – similar but new sizes and shapes)

 3” x 3” Mini Album -- Z1166 pg 120 (ALREADY SOLD OUT)
• My Creations 3 ring binder -- Z1141 pg 120
• Kraft Color Ready Borders -- Z1377 pg 120
• Red Eye Pen -- 3501 pg 121
• Embossing Powders – Clear -- Z671 pg 121
• Embossing Powders – Heavenly Blue -- Z647 pg 121
• Embossing Powders – Pansy Purple -- Z664 pg 121
• Embossing Powders – Silver Pearl -- Z678 pg 121
• Block Buddy Set -- Z1289 pg 121
• Pivot Point Stapler -- Z1009 pg 122
• Texture Tools – Foam Tools -- Z1090 pg 122
• Fun Flock -- Z263
• My Accents Organizer -- Z183 pg 123 (SOLD OUT)
• My Accents Block Organizer -- Z185 pg 123
• Euro Personal Paper Trimmer -- Z338 pg 123
• Euro Replacement Blades -- Z339 pg 123
• Euro Replacement Blade/Scoring -- Z340 pg 123

The individual packs of 24 sheets of one color of cardstock have been changed in the new book. There are 15 colors you can continue to buy in packs of 24. With the new book, you can buy a pack with 3 shades (example: Light Red & Pink Shade Pack which includes Blush, Hollyhock, and Tulip).

NEED BULK for Holiday cards? Don’t delay!
• Cardstock 24 pk 12” x 12” – Grey Flannel -- 5573 pg 124
• Cardstock 24 pk 12” x 12” – Grey Wool -- 5571 pg 124
• Cardstock 24 pk 12” x 12” – Brown Bag -- X5644 pg 124
• Cardstock 24 pk 12” x 12” – Parchment -- X5645 pg 124
• Cardstock 24 pk 12” x 12” – Amethyst -- X5631 pg 125
• Cardstock 24 pk 12” x 12” – Baby Pink -- 1299 pg 125
• Cardstock 24 pk 12” x 12” – Heavenly Blue -- 1285 pg 125
• Cardstock 24 pk 12” x 12” – Key Lime -- 1235 pg 125
• Cardstock 24 pk 12” x 12” – Sunkiss Yellow -- 1240 pg 125
• Cardstock 24 pk 12” x 12” – Taffy -- X5630 pg 125
• Cardstock 24 pk 12” x 12” – Juniper -- X5752 pg 125
• Cardstock 24 pk 12” x 12” – Lilac Mist -- 1295 pg 125
• Cardstock 24 pk 12” x 12” – Sorbet -- X5751 pg 125
• Cardstock 24 pk 12” x 12” – Spring Iris -- 1296 pg 125
• Cardstock 24 pk 12” x 12” – Tulip -- X5753 pg 125
• Cardstock 24 pk 12” x 12” – Gypsy -- X5757 pg 125
• Cardstock 24 pk 12” x 12” – Holiday Red -- 1274 pg 125
• Cardstock 24 pk 12” x 12” – Sunny Yellow -- 1225 pg 125
• Cardstock 24 pk 12” x 12” – Sunset -- X5758 pg 125
• Cardstock 24 pk 12” x 12” – Topiary -- X5635 pg 125
• Cardstock 24 pk 12” x 12” – Cotton Candy -- X5760 pg 125
• Cardstock 24 pk 12” x 12” – Dutch Blue -- 1241 pg 125
• Cardstock 24 pk 12” x 12” – Lagoon -- X5762 pg 125
• Cardstock 24 pk 12” x 12” – Pear -- X5764 pg 125
• Cardstock 24 pk 12” x 12” – Sky -- X5761 pg 125
• Cardstock 24 pk 12” x 12” – Autumn Terracotta -- 1270 pg 125
• Cardstock 24 pk 12” x 12” – Barn Red -- X5637 pg 125
• Cardstock 24 pk 12” x 12” – New England Ivy -- 1282 pg 125
• Cardstock 24 pk 12” x 12” – Pansy Purple -- 5590 pg 125
• Cardstock 24 pk 12” x 12” – Sunflower -- 1242 pg 125
• Cardstock 24 pk 12” x 12” – Garden Green -- 1244 pg 125
• Cardstock 24 pk 12” x 12” – Goldrush -- 1243 pg 125
• Cardstock 24 pk 12” x 12” – Hollyhock -- 1246 pg 125
• Cardstock 24 pk 12” x 12” – Indian Corn Blue -- 1284 pg 125
• Cardstock 24 pk 12” x 12” – Vineyard Berry -- 1248 pg 125
• Cardstock 24 pk 12” x 12” – Buttercup -- 1271 pg 125
• Cardstock 24 pk 12” x 12” – Garnet -- X5638 pg 125
• Cardstock 24 pk 12” x 12” – Moonstruck -- 1293 pg 125
• Cardstock 24 pk 12” x 12” – Ponderosa Pine -- 1276 pg 125
• Cardstock 24 pk 12” x 12” – Smokey Plum -- 1291 pg 125
• Cardstock 24 pk 12” x 12” – Blush -- X5640 pg 125
• Cardstock 24 pk 12” x 12” – Crystal Blue -- 1292 pg 125
• Cardstock 24 pk 12” x 12” – Honey -- X5668 pg 125
• Cardstock 24 pk 12” x 12” – Petal -- X5667 pg 125
• Cardstock 24 pk 12” x 12” – Twilight -- X5666 pg 125

The combo packs below are retired only because our seasonal color palatts have been rearranged. The 12 colors in each season have changed, but we still have all the same 60 colors.
• 12” x 12” Combo Cardstock Pack – Antique -- X5686 pg 124
• 12” x 12” Combo Cardstock Pack – Timeless -- X5700 pg 124
• 12” x 12” Combo Cardstock Pack – Harmony -- X5682 pg 125
• 12” x 12” Combo Cardstock Pack – Blossom -- X5756 pg 125
• 12” x 12” Combo Cardstock Pack – Carnival -- X5765 pg 125
• 12” x 12” Combo Cardstock Pack – Celebration -- X5766 pg 125
• 12” x 12” Combo Cardstock Pack – Harvest -- X5684 pg 125
• 12” x 12” Combo Cardstock Pack – Garden -- X5698 pg 125
• 12” x 12” Combo Cardstock Pack – Classic -- X5685 pg 125
• 12” x 12” Combo Cardstock Pack – Cozy -- X5800 pg 125
• 8 ½ ” x 11” Combo Cardstock Pack – Antique -- X5691 pg 124
• 8 ½ ” x 11” Combo Cardstock Pack – Timeless -- X5705 pg 124
• 8 ½ ” x 11” Combo Cardstock Pack – Harmony -- X5687 pg 125
• 8 ½ ” x 11” Combo Cardstock Pack – Blossom -- X5755 pg 125
• 8 ½ ” x 11” Combo Cardstock Pack – Carnival -- X5767 pg 125
• 8 ½ ” x 11” Combo Cardstock Pack – Celebration -- X5768 pg 125
 8 ½ ” x 11” Combo Cardstock Pack – Harvest -- X5689 pg 125
• 8 ½ ” x 11” Combo Cardstock Pack – Garden -- X5703 pg 125
• 8 ½ ” x 11” Combo Cardstock Pack – Classic -- X5690 pg 125
 8 ½ ” x 11” Combo Cardstock Pack – Cozy -- X5801 pg 125

• Stamp Pad set – Antique -- Z1564 pg 124
• Stamp Pad set – Timeless -- Z1569 pg 124
• Stamp Pad set – Harmony -- Z1560 pg 125
• Stamp Pad set – Blossom -- Z1570 pg 125
• Stamp Pad set – Carnival -- Z1573 pg 125
• Stamp Pad set – Celebration -- Z1574 pg 125
• Stamp Pad set – Harvest -- Z1562 pg 125
• Stamp Pad set – Garden -- Z1567 pg 125
• Stamp Pad set – Classic -- Z1563 pg 125
• Stamp Pad set – Cozy -- Z1600 pg 125

• Marker set – Antique -- Z1554 pg 124
• Marker set – Timeless -- Z1559 pg 124
• Marker set – Harmony -- Z1550 pg 125
• Marker set – Blossom -- Z1571 pg 125
• Marker set – Carnival -- Z1572 pg 125
• Marker set – Celebration -- Z1575 pg 125
• Marker set – Harvest -- Z1552 pg 125
• Marker set – Garden -- Z1557 pg 125
• Marker set – Classic -- Z1553 pg 125
• Marker set – Cozy -- Z1610 pg 125

• Textured Cardstock – White Daisy -- X5671 pg 124

NEW Autumn/Winter Idea Book 2001

I have the new book in my hands!  WOW oh WOW it's exciting to see all the new product, changes, and fantastic artwork.  One of the BEST things EVER is the new LOWER prices on all our stamp sets!  Yes you heard me right!!!!  Our stamp sets are now $6.95 to $29.95.  (Were $7.95 to $34.95).

Another exciting new product - our very own Cricut cartridge!!!  We offer the Cricut Art Philosophy Collection that includes the cartridge, (3) D-size stamp sets and (3) Dimensional Elements.  These all work together and you can use your Cricut to cut out the images.  Throughout the Idea Book you'll see stamp images with red lines around them.  All those images can be cut with the new Cricut cartridge! 

Also, I am so excited that in the new book all our stamp images are shown ACTUAL size!!!!  Lots more to share so stay tuned!

The new book is "Live" August 1.

Friday, July 15, 2011

thank you squares

Happy Friday! I'd like to share a card with you today that I had THE best time making! I am on a roll with combining my CTMH stamps and the CPS sketches - this is my card for this week's sketch, #226.  I used one of my VERY favorite stamp sets.  (I say that a lot, don't I?)  Thank You has sentiments of every shape and size.  Seriously, you NEED this set in your stash if you create a lot of thank you cards! I stamped the "thanks" squares in Pear, Outdoor Denim, and Sunflower and adhered them to white cardstock using foam tape.  Then I stamped the circle "thank you" in Pear ink, layered everything up with some large circles and TA-DA!

Thursday, July 7, 2011

tailor-made

I broke out another new-to-me stamp set this week . .. it's called Tailor-Made, and it has the cutest little sewing images! I have been cranking out cards for the Card Positioning Systems blog, and this is another one.  It's based on this week's sketch, #225.

After I stamped the images in Bamboo ink, I used a brown colored pencil to trace over parts of them, adding some little shadows and depth.  I like the way it turned out! And I just LOVE the measuring tape.  I think it's my favorite stamp in the set!

Have a great weekend!

Saturday, July 2, 2011

Life is Good!

Hello, hello! I created this card based on this week's sketch at Card Positioning Systems (in fact, you can see this card over there too!) It's a clean and simple sketch, and it was a lot of fun to create with! If you are feeling stumped for some inspiration, I highly recommend the CPS blog.  Another fun challenge blog I like is The Playdate Cafe - all of their challenges are COLOR based (but not specific to any one manufacturer) and it's a totally fun way to get motivated!

Okay - so on this card, I used this fun color combo: Sunflower, Lagoon, and Pear.  I used the Treetops stamp set, along with the cloud from Over the Rainbow.

I hope you have a FABULOUS 4th of July weekend! We are off to the beach and the pool with family, now that Tanner is (just at this very second) waking up from his nap. SO, I suppose I better go rescue my little one, and pack up our towels and swimsuits!  See you next week!
xoxox

Saturday, June 25, 2011

lagoon and white

A perfect card for summer weddings, or maybe even a graduation.  I love the Lagoon and White together!  I  used a stamp from Salutation Seals, stamped in Lagoon ink.  The ribbon is just Offray ribbon from JoAnn's.  To create the corners, just stick the corner of your cardstock into a small circle punch, with the corner pointed toward the center of the circle.  (Try it on a scrap piece first, to see how large of a corner you'd like!)

Thursday, June 16, 2011

two for the price of one!

Sorry to trick you. . .no, there's no two-for-one deal going on, on stamps. . . .but do i have TWO cards to share with you today!  When the current catalog came out, I was SUPER EXCITED about this stamp set.  It's called Retro Tech, and it has very cool vintage looking images of phones, a television, record player, camera, etc.   I have been making some SUPER SIMPLE, clean and graphic cards with these stamps.  And I love them!  They are so quick and easy, I thought I'd better share two of them today!
On this first card, I cut some squares of cardstock (great way to use up scraps!) to create the bottom border.  And i stuck a rhinestone jewel over the camera flash.

I stamped the records in Cotton Candy, Pear, and (shhhh.. . .) Breeze (I keep trying not to use that color anymore, since it's gone, but I just can't help myself! WHY oh WHY they discontinued it, I have no idea. Sniff, sob. Gulp. Okay, I'm done now.)

Sometimes I get so bogged down trying to create an intricate masterpiece, that it is refreshing to just stamp something quick, simple, and to the point. No layers, no busyness - just a crisp clean image.

Have a fabulous week! I am off now to create a Father's Day card with my little men.  I won't be stamping on it, but if you want a sneak peek. . . .check out this link.  If you have a technology geek in your house, you might want to try it too!!! (It's ADORABLE!)

Wednesday, June 8, 2011

happiness is. . .a snazzy color combo!


A few weeks ago I made a similar card, (which you can see  HERE.) When I'm feeling stuck, and I don't know where to start on a project, sometimes I steal my own ideas.  So that's exactly what I did.  I loved the card I did a few weeks ago, so I just copied it using different paper, colors, and stamps.  

I used Sky, Sorbet, and Sunflower together on this card.  I think it's a really fun summery color combination.  I came up with it, because the stamp pads happened to be stacked next to each other, and I thought, "Oooh, that would be nice together!" And then I came up with a few other color combos to try, that same way.  (So I have a head start, the next time I sit down to create!)

The stamps are both from the Paper Lantern stamp set. (Swooon, I love that stamp set!) 

To create the card, I simply cut a bunch of  Sunflower and Sorbet strips, layered them onto a block of Sky cardstock, matted it with Sorbet, and adhered it to my Sky colored card base.  And then I added my sentiment and lantern. Super fun, and easy to do.  (My favorite things!)

Friday is FINALLY the last day of school.  (I swear, this has been the LONGEST week ever, even for ME!)  We're all looking forward to the lazy days of summer vacation! And I don't have a Kindergartener anymore!!! First grade!? YIKES!

Have a great weekend!!!!
XOXO

Sunday, June 5, 2011

wishing you sunshine!

This 8x4 card was created with the Splendid Day stamp set, along with Miracle papers.  And the puffy cloud is from Over the Rainbow (you know, the stamp set I use - oh- every other day!) 

I have been working away on some cards to share with you in the upcoming weeks, and my trusty Close To My Heart consultant, (and fabulous mommy that she is) is about to send me a batch of new-to-me stamps to play with.  Hooray!!!!!  Nothing helps me accomplish  projects like NEW STAMPS to play with!

I hope your weekend has been FABULOUS! I'll be back in a few days with a card I did last night, and I really have to say, I love the way it turned out! My teaser is. . . .it uses no patterned paper.  But it LOOKS like it does.  And it's a fun new summery color palette! Okay - enough said! See you soon!
XOXO
Laura,

Saturday, May 28, 2011

happy polka-dotty hearts!

Happy Memorial Day weekend!  I hope your weekend is off to a GREAT start! We've already been to the beach on Thursday afternoon, and tonight (although he doesn't know it yet) the hubby will be cooking hamburgers and corn on the cob, on the grill for dinner!  Bryce only has two more weeks of school, and then I will have to figure out what the heck to do with him all summer long!!!!!

Today I'd like to share a sweet pink card with you.  It could certainly be a Valentine, but I think it would work for any other day of the year too.  I used Sweetheart papers, along with the coordinating Affection stamp set.

I stamped the hearts in Cotton Candy ink, and I stamped the stem in black - but second generation (meaning, i stamped it once on a piece of scrap paper, and then onto my white cardstock.  I used a piece of white ribbon from my stash, and used the Fiskars Threading Water punch for my scallops.

Thanks for stopping by today! Have a safe and relaxing weekend!
XOXO

Thursday, May 19, 2011

Teachers Rule

Well, Mr. B is in the final countdown of Kindergarten.  I think we're down to 14 school days left. (Gulp!)
I thought it was a good time to come up with a teacher card idea, for end of the year thank-yous.  I used In The Month of August, along with Fanfare patterned paper.  The cardstock is Sky, and Pacifica.

This card is completely scraplifted from one of my favorite cardmakers, Julie Campbell.  I am so thankful that we have become friends online, and worked together from time to time.  She recently achieved one of her DREAMS, becoming one of the newest Go To Gals at Paper Crafts magazine! I was over the MOON thrilled for her!  The card I created is based on one of her cards featured in Paper Crafts Card Style special issue that came out last year.  (It's on page 21, if you happen to have the issue at home!)  Julie's card featured a bubble gum machine in the circle, and lots of repeating circles throughout the card.  And I LOVED the way she put the pearls along her rounded corner.  So THANK YOU, sweet Julie, for the fabulous inspiration!! Getting ideas from other cardmakers is a great way to become a more accomplished cardmaker, copying ideas from those you admire.  Plus it can be a great motivation to get some projects DONE!!! If you post your work online, just be sure to give credit where credit is due!

If you'd like to scraplift my card that I scraplifted from Julie, LOL, post it online and leave a link in the comments! I'd love to see what you create! :)

Monday, May 9, 2011

Card Ideas

The birdhouse card was inspired by a card sent to me by Karen Pederson. Karen created her card using the stamp set from the Mayberry WOTG.  My colors, papers, and basic format are the same as Karen's card, but I made some minor adjustments. Sharing ideas can inspire a lot of creativity! I always need that inspiration! (C1445 Bless  This Nest, Mayberry Paper Pack).


The second card is something I have used over and over but with different papers and ink colors. I LOVE THAT STAMP SET, A Little Of Everything!!! It's a great way to use paper scraps too.  (D1408 A Little Of Everything, Mayberry Paper Pack).

Friday, April 29, 2011

Chairs to YOU!! (and me!)

It's almost MAY!!! And do you remember what that means???? A new stamp of the month - it's one of my VERY favorite stamp sets.  I made this card AGES ago, and I've been waiting and waiting to share it, until it got closer to MAY.  (I didn't want to taunt you TOO much, before you could get this stamp set into your inky hands!)

I will admit, I REALLY wanted to cut out all those little areas in between the chair decorations.  But I just couldn't do it.  So I'm pretending I totally wanted it that way, and just rolling with it.  (We have to do that sometimes - just roll with it.)

I paired a little ribbon from my stash with the Watermelon and Kraft chair.  I am loving the color combination! (And I'm OBSESSED with Kraft, in case you hadn't noticed yet!)

So - chairs to YOU. . .it's the weekend!
chairs to ME. . .it's my birthday!
chairs to ME. . . it's my anniversary!
chairs to Prince William and Kate . . .they chose to get married on MY special day!
chairs to the astronauts about to take off this afternoon . . .it's a momentous day all over the world!

xoxo

Thursday, April 21, 2011

pinwheels spinwheels. . .

Happy almost-Easter!!!!  This past weekend, we had an un-birthday party (it's a long story) at The Little Gym, where the boys have both taken gymnastics classes for pretty much their whole little lives!  I was trying to decide what fun thing I could decorate cupcakes with, since we didn't really have a theme, and there would be boys and girls of all ages there.  I decided on these cute little SUPER easy pinwheels.  I used Animal Crackers paper (which we are all sad isn't available anymore) but you could use any of Close To My Heart's two sided papers to create this fun project.

Simply cut a 3x3 square. Gently crease the paper from corner to corner on both sides, to find the center point.  Then cut from each corner to ALMOST the middle, being careful not to cut the whole thing up into triangles! Then pull one side of each section down towards the center.  Use your piercing tool to poke a hole (make sure to go through each layer) and stick a brad in the center.  I hot glued the pinwheels to short kabob sticks, and stuck them in the cupcakes.  I really should have done a tutorial to share with you, but if you google it. . .I promise you'll find a lot of them, if you need more help.
Totally un-paper related but equally fun, are the rainbow cupcakes.  These are quickly becoming a kid-party tradition in our household.  Use yellow or white cake mix, prepare it as directed.  Then divide it into separate bowls - however many colors you want, and just add food coloring to each dish.  Blend it until you have the colors as you like them.  Then just spoon each color into your cake pan.  If you're doing a regular size cake, just distribute the spoonfuls evenly.  If doing cupcakes, just do a small (really small) scoop of each color.  After they bake, they look sort of tie-died.  You can try to smooth out the layers and make them truly rainbow-like, but I sort of like the splotchiness of it!

 I also used a new-to-me frosting recipe for these cupcakes.  Wilton's Fluffy Boiled Frosting.  It came out pretty nice! Not as super-sweet as buttercream, and there's no butter or shortening in it. (So it's fat free! Does that count as healthy??? Perhaps not so much!)  It is the consistency of marshmallow fluff.  Pretty fun stuff!
I totally forgot to take a picture, but we also made favors.  We made rice krispie treats with Froot Loops in them.  (Here's the recipe I used!) I wrapped each individually in plastic wrap, and then wrapped a 1 inch band of patterned paper around it, finishing it off with some baker's twine.  It coordinated with the pinwheels, and it was pretty adorable!

The pinwheel cupcake toppers would be perfect for Easter!!!  I bet a tray of pinwheel cupcakes would be a fabulous centerpiece!

HAPPY EASTER!

Thursday, April 14, 2011

new stamps! hooray!

May is almost here! Have you checked out the May Stamp of the Month yet?????
Chairs.
Oh my CHAIRS!
Chairs to color.  Chairs to paper-piece.  Chairs to leave just as-is.
"Chairs to YOU!"
(But since it isn't quite May yet, here's the link to April's lovely Stamp of the Month set. . .maybe you need both sets, so place an order NOW, and then again in May!) 

I left two chairs as is, and then cut the comfy big chair from Vineyard Berry cardstock.
I think I want to do this card again, and use some crazy funky paper (or maybe even fabric!) because I have some "one of a kind friends" who are WAY more one of a kind than just Vineyard Berry!
Or here's another idea.  Stamp a pattern onto cardstock, and THEN stamp the chair over it.  Hmmmm. I think I might try that today! :)  Thanks for inspiring me!

And have you seen?  There's another new stamp set - with a fabulous cause.  It's called Hope For Japan, and you can purchase it HERE for only FIVE dollars! Even better - 100% of the proceeds will go to the American Red Cross to help Japan.

Happy Thursday! The weekend is almost here.  Doing any stamping this weekend???
XOXO

Thursday, April 7, 2011

happy birthday!!!!!

Hello, hello!!! April is upon us! It is the season of birthdays - I think half of the people I know and love seem to have a birthday in April (oh, including ME!)

I created this card using Sunny Yellow, Sunflower, and Sky paper and ink.  And the stamp set, called Candlelight is one of those "super-practical-adorable-must-have" sets.  You'll use it all the time, I promise! The sentiments are terrific and you can use the candles as firecrackers, menorah candles, or birthday candles!!! I've even used the outline candle as a tag or tiny journaling block.  HELLO double-duty stamps! (LOVE THAT!)

Little design note: The three blue dots that look sort of like brads (but they aren't) were simply dots that I cut from a second stamped image of that polka dotted candle!

I rattled on, at my blog today, about a dear friend of mine whose birthday is TODAY!!! Her name is Karisse, and she is super creative, and has quite an amazing story.  Head on over to my blog to find the links and read all about her inspiring story!

I hope you are having a beautiful Spring day!
See you next week!

Thursday, March 31, 2011

a true friend remembers. . .

Finally a break in the rain so I could photograph this card to share with you today! I used Treetops, in Pear and Chocolate ink, along with some red jewel apples.  The sentiment (inside and out) is from the Card Chatter - Birthday set.  I wasn't sure I liked the way the chocolate ink showed through, underneath the green part of my tree (I popped that up on foam tap) but now that I'm looking at it in the photo, I really like it because it makes a great shadow effect.

As a quick finishing touch, I added some baker's twine top the top of this card.  Easy peasy!  
We are enjoying Spring Break  . .although it's rained for half the week, we've managed to have a pretty good time, and it's been nice to have the wacky and wonderful 6 year old home all week.  And we started off vacation with my parents here for a quick visit (which is why you didn't see me here last week! I was playin' with my parents!)
I hope you have a terrific weekend! Back to the grind, next week!
XOXO

Thursday, March 17, 2011

Top 'O the Mornin' to Ya!

Have you been pinched today, or did you remember to wear green today?  Thankfully, the toddler boy doesn't know about such traditions, because so far, I am green-less today.

It doesn't get much more quick and simple than THIS clean white card.  But you may be a little surprised about the stamp I used. . . it's the cute Affection stamp set, with all the sweet hearts and flowers.  The heart flower makes a perfect clover, and the dotted stem can be bent to fit right in it.  (Gotta love clear stamps, that you can curve and bend!)

I am obsessed with twine right now.  A few friends and I split a GIANT (and I mean SERIOUSLY GIANT . . .3400 yards) roll of twine (well, we actually split three rolls of twine: red, green, and brown, but who has to know that?)  So I will be making cards, and wrapping gifts with twine for the next 5 years.  Hopefully it will stay in style for a LONG time.

I hope you have a lucky day today! Bryce was super excited to go to school, because he was pretty sure that some leprechauns were going to have made some trouble in the classroom overnight!  I can't wait to see if he was right!!!

Happy St. Patrick's Day!

Friday, March 11, 2011

happy trees!

Hello, hello! Today I have a card to share with you, featuring Treetops and Over the Rainbow.  The trees in the Treetops set are quite versatile. . .they are bright and springy on this card, but envision them stamped in Vineyard Berry, and Autumn Terracotta, for a beautiful autumn card.  I stamped the trees in Pear ink, and stamped and trimmed some on Pear cardstock, popping them up on foam tape. 

I chose a white background for this card, but I sort of want to do it again, and put it on blue cardstock, just to see how it turns out.

Next week I'll be back. . .with a St. Patrick's Day card - using a NON-St. Patrick's Day stamp set! Fun, fun, fun!

Have a terrific weekend.  Go make something pretty!
XOXO

Thursday, March 3, 2011

Don't scrap the scraps!

It's a quick and SCRAPPY card today - I sat down to create, with two goals. #1 - Make a QUICK card (because I could only contain the 18 month old at my feet, for a short time!) #2 Use up the scraps of Mayberry paper, that I couldn't bear to throw out!

So here's what I came up with. I loosely based this card on a sketch from Paper Crafts Magazine. But it took on a life of its own, as cards so often do! I inked the edges of all of my paper in Gray Wool ink. Inking the edges always makes it look more finished to me. If I had a sewing machine, I would have stitched it - sort of a patchwork quilt sort of deal. And the kraft color-ready border was the perfect finishing touch, along with some Opaques stuck on!

And once Tanner got busy playing with adhesive tubes (sealed of course!) and ribbon at my feet I had another two minutes to embellish a matching envelope!

Success. And a quick cute card to send out for a special someone's birthday!
So go sit down with some scraps, and see what you can create! Have a terrific weekend!
XOXO

Saturday, February 26, 2011

have a splendid day!

Spring is REALLY springing around here. . ..pollen is covering EVERYTHING, the grass is on it's way to GREEN, and the weather is getting quite warm all the sudden. (It IS still February, isn't it?)

This springy little card features Mayberry papers, and the oh-so-cute stamp set called Splendid Day. Here are a few of the sneaky little techniques I used:
-to create the grass, I inked the edge of my cardstock in green. Depending on how you brush the cardstock over the ink, you can get a lot of different effects. I just brushed it straight up and across - and came up with this grassy look. (Love that!!!)
-If you look at the stamp set, you'll see that the banner I used for my sentiment has a triangle and string on the end, where you can attach it to the airplane stamp. But if you trim carefully, you can trim that end right off, and use it on it's own, without the plane. (Love that!)

I hope it's starting to feel like spring (and not winter, OR summer) where you are! Enjoy it while it lasts!!!! See you next week! :)


Thursday, February 17, 2011

One card, three ways

One stamp set. One card layout.
And a variety of paper bits, and embellishments.

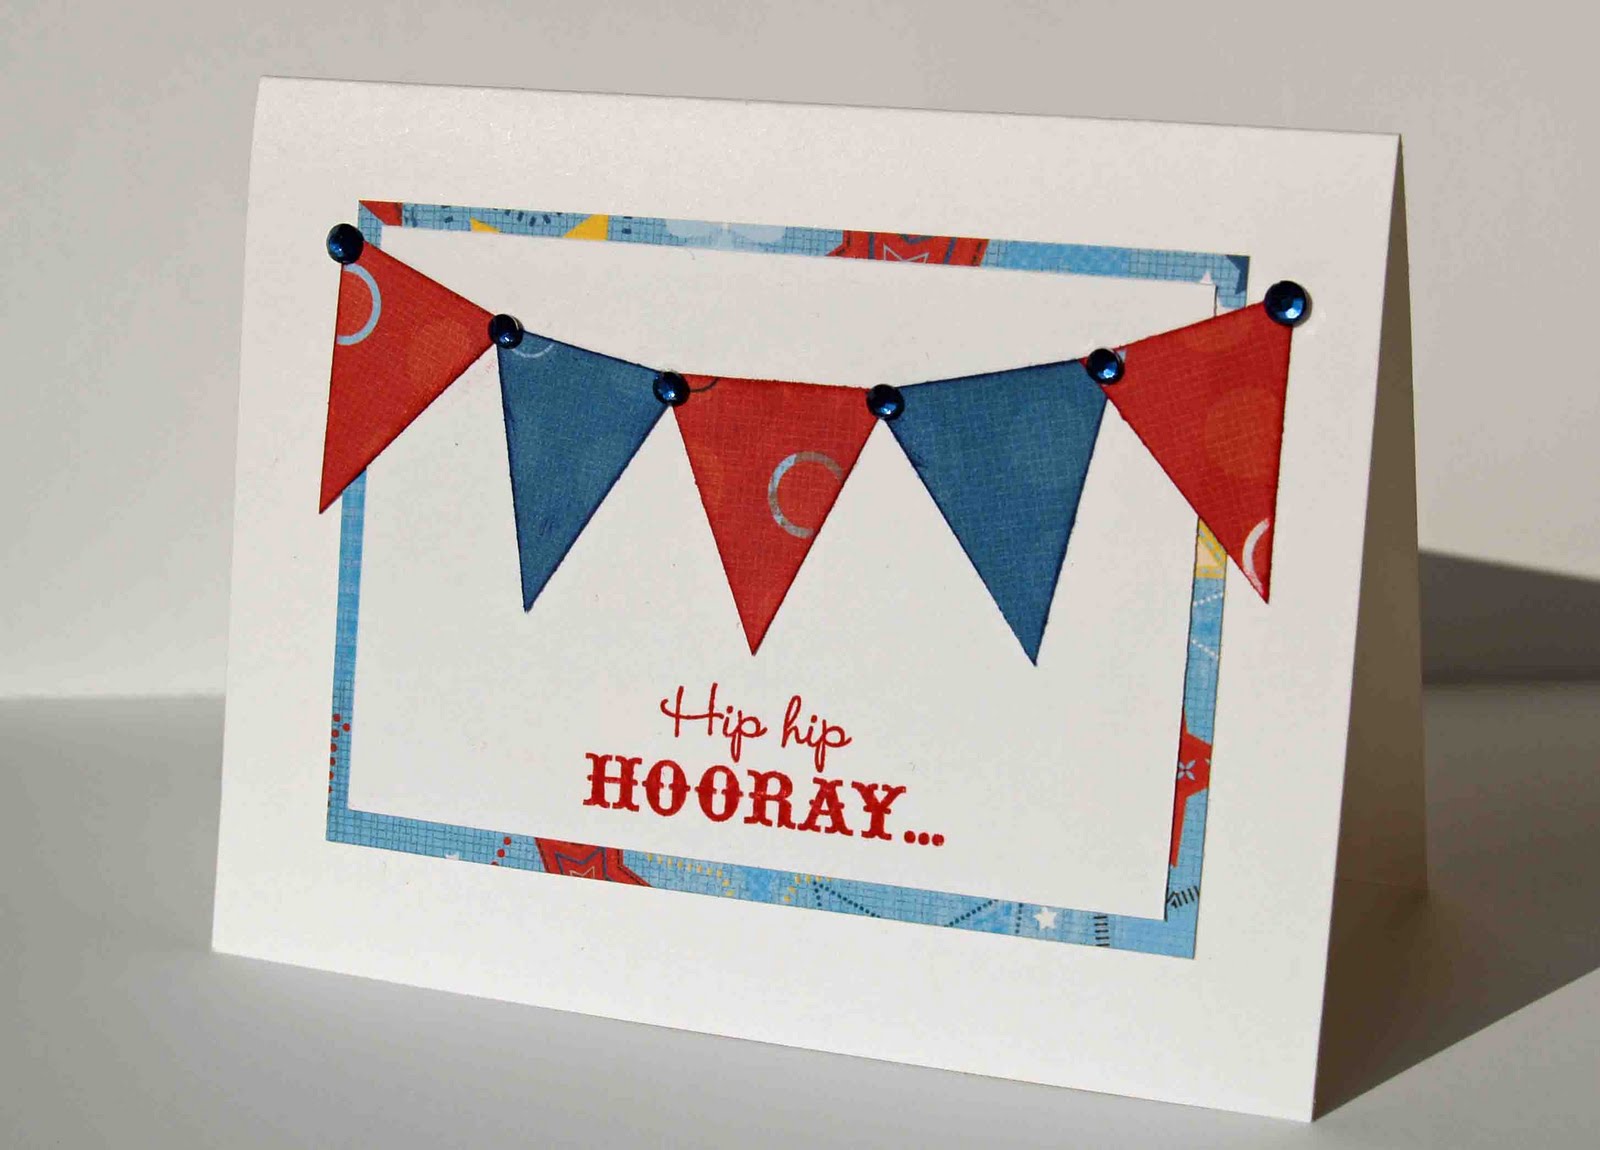
I used the Card Chatter - Birthday stamps for all three of these cards. And the same layout. Pennant flags are so trendy right now! CTMH has an adorable pennant alphabet stamp set, and the Party Pennants set (also completely adorable!) But just in case you don't have those sets (yet) here's a way to tide you over. I created these pennants by cutting a rectangle of patterned paper, 1x2.5 inches. Lay the rectangle on your paper trimmer, lining up the opposite corners on the cutting line. (To cut two obtuse triangles.) Then, lay the two pieces back together, and cut from the opposite side, corner to corner. You'll have FOUR pieces - two of them will be the pennant shape. Cut a couple in different papers, and you can mix them up a bit! Or just use the front and back side of the paper, for some variation. (I hope that made sense, I seem to have a 17 month old screaming at my feet.)

Using Fanfare paper, and jewels. I inked the pennant's edges in coordinating ink.
Using Sophia paper, and pearls.
Love how this card can be totally girly, kid-friendly, or masculine. Just change up the embellies and papers. And you can play around with the measurements of your pennants to adjust them for a 12x12 layout, or a smaller card. Have fun!!!!!

Thursday, February 10, 2011

it's your birthday. . .celebrate!

I have more NEW goodies to share with you today! This card features the new Fanfare paper. Perfect for birthdays, 4th of July, and summertime (among many other occasions, I'm sure!) I hand cut some of the stars from the paper to use as embellishments around my sentiment. Remember the rule of THREE when you create. The three stars, placed in a loose triangle shape cause your eye to continue roaming around the card. It's a good trick to turn to, if you feel like there's no focus to your project. Three elements - even if they aren't the same, to move your eye around the card, layout, painting - WHATEVER you're working on. Trust me, it will work! :)

I purposefully tried to keep this card FLAT, so it would be easier to mail, but I really want to go back and add some buttons or brads to the star's centers! I inked the edges of all my papers, in their matching color of ink, just to accentuate their edges. I think this really makes elements on a card POP! (And I love POP!)

The stamps are from the set, Card Chatter - Birthdays. If you create a lot of birthday cards, this might be a stamp set you NEED!!!! It has a great array of sentiments, just perfect for card-making.

Have a terrific weekend! I'll be back next week. . .with SOMETHING (hopefully something fabulous!) to share with you!!! XOXO


Monday, February 7, 2011

Hilton Garden Inn February CROP

We had a wonderful weekend at the Hilton Garden Inn cropping away.  New friends, new projects, new techniques, and new ideas!!!!

Want to join us the next time?  Save the first weekend in April!  We'll be back to the Hilton Garden Inn the first weekend in April!  Watch for the specific details (We may begin on Friday afternoon), and make sure you contact Kim (scrapnstik@aol.com) to join her mailing list.  Space will be limited!

A great big thank you to Kim of Scraptique, Inc. for ogranzing our incredible weekend!


Making New Friends

Making lots of scrapbook pages, cards, and projects

Learning to stamp

Discovering new techniques and products

Sharing the moment


Thursday, February 3, 2011

Paper Lanterns!

Paper Lantern. My new favorite stamp set. (I say that all the time, don't I?!) But seriously, I have been using this set non-stop since I got it! The two sentiments are fabulous, and the paper lanterns are versatile, easy to stamp, and fun to play with.

You may have already seen this card, if you saw the sneak peek of it on my blog a few days ago. It was also on the Card Positioning Systems blog last week. It's clean and simple, and I love the way it turned out. Just the way I had envisioned it in my head. (That doesn't always happen, so it's always a pleasant treat when it does!)

I used Tulip, Sunny Yellow, and Lagoon for this card. Love these bright cheery colors together!!! Have a terrific weekend! I'll see you next week!

Sunday, January 30, 2011

Yummy Candy Treats

Thanks to Karen Pederson for sharing her cute creation - I was inspired to play with this idea too!  Here's what I created at the Create & Crop on Saturday.

Thursday, January 27, 2011

a little more love!

I have a little more LOVE for you this week, using the NEW Sweetheart paper, and Affection stamp set (plus one of those cute pink buttons!) You can create lots of cute mixy-matchy flowers and hearts with this stamp set. And isn't it about time to whip up some Valentines? Even if you don't have these new products, the layout of this card (and last week's) would be pretty easy to duplicate using other adorable stamps and papers!!!! So give it a try! And if you do, be sure to link us up to your creation! We would love to see it!!!!

Tuesday, January 25, 2011

Wings Workshop on the Go Kit

Wings Workshop on the Go Kit
from the new Spring/Summer 2011 Idea Book

The new Wings WOTG kit includes a stamp set and papers I really like.  The kit also has a color brochure for creating scrapbook layouts and cards.  The card above is not one of the cards in the brochure, but it does use the supplies in the kit.  This is a fast card to create!


Thursday, January 20, 2011

new! new! new!

I received not one. . .but TWO boxes of CTMH goodies in the mail on Tuesday! (Plus two different magazines with my cards published in them!) It was a BANNER MAIL DAY, that is for sure! So what do you think I did? I sat right down to play of course! On this card, I used NEW patterned paper from the Sweetheart line, along with a NEW stamp set, called Affection. This paper pack features the colors Tulip, Baby Pink, Cotton Candy, and Black.

Love it. Love it. Love it.
Next week I'll have something else NEW to share with you! I have so many new goodies to play with, I can hardly stand it! (Not that I'm bragging or anything! Well. . .maybe just a little!)

Have a terrific weekend!

Wednesday, January 19, 2011

Weekend Crop in Fort Myers - February 5-6

WEEKEND ESCAPE

Kim of Scraptique, Inc. (Scrapbooks N Stickers) has organized a fantastic weekend crop at the beautiful Hilton Garden Inn FGCU/Airport across from the Gulf Coast Town Center, Fort Myers Florida.

Saturday, February 5, 2011 from 7:00AM until Sunday, February 6, 2011 at 12:00 Noon.
.
This location was selected to accommodate our friends from the east coast of Florida as well.  This is also perfect for those of you across Alligator Alley that want to get away. Stay at our host hotel where the crop is being held, and shop at the Gulf Coast Town Center or down the road at the Miromar Outlets.
.
If you are interested in this event,  please e-mail me for a special deal available to my Close To My Heart friends  (JoeSusan@aol.com) AND email Kim to join her email list at ScrapNStik@aol.com.  By joining Kim's list you will hear about all future events so you won't miss out on the fun in SW Florida!

Can't come for the entire event?  Ask about special classes available on Saturday.  Email for more details.

Cost:  $45 for the entire weekend and includes:
  • Non-stop cropping from 7 AM Saturday to 12:00 Noon on Sunday
  • Late lunch on Saturday afternoon (approx. 3 pm)
  • Two full 12 X 12 two page layout kids from Scraptique
  • FREE Create & Take projects from Scraptique and Close To My Heart
  • Optional Classes (space is limited)
  • TWO goodies bags full of surprises and snacks!
  • Prizes and more

Saturday, January 15, 2011

You Color My World

A few days late, but HERE I AM! Mr. B was sick for the first part of this week, and of COURSE, right about the time he was getting better, I got sick. I think I am finally on the upswing though, and I am happy to be stopping by today with another card using the brand new Wings paper. I also used stamps from Priceless Love. I shared a Valentine card using these stamps, a few weeks ago - and I TOLD you it could be used for so much more than Valentines! (Believe me now?) ;)
I love handcutting the little butterflies from this paper. I added just one little one to the top of my sentiment, and I folded up the wings a bit, and only added adhesive in the center. It adds a fun little bit of dimension.
I have NEW PRODUCT coming to me soon! I can't wait to play, and I can't wait to share my creations with you!
Have a terrific weekend!

Thursday, January 6, 2011

Happy New Year!

Have you seen the new paper, Wings? The base of this 4.25x8.5-inch card is Vineyard Berry, and then I layered some of the new Wings patterned papers, topped off with Vineyard Berry pleated ribbon, from the Level 2 Assortment, as well as a black button from the Mini Medley Accent Collection. (You can find both of these things on pages 6-7 of the Inspirations Product Sneak Peek! Speaking of which, have you checked out the Sneak Peek online yet? You will find gorgeous products and ideas using the new Wings kit. The color combo of this kit is GORGEOUS - Vineyard Berry, Juniper, Sweet Leaf, and Black. Simply stunning! I'll be back next week with another card using this paper!

Happy January! See you next week!

(card details: sentiment stamp "Life Is Good" from the Treetops stamp set. The butterflies were hand cut from one of the patterned papers in the kit. Brown twine was from my stash.)